Introduction Mobile Screen Replacement
To maintain the usability of any device, a screen replacement and repair must be done. Knowing the right time to opt for screen replacement over simple repair can save both time and money. This guide takes you through damage identification, choosing between do-it-yourself (DIY) or professional repairs as well as how to avoid future problems. Dive into master screen replacement and repair, ensuring your devices stay in top condition.
Section ### 2. Identifying Screen Damage

Screen damage identification is the first crucial stage in the process of replacing screens and carrying out repairs on them. Different kinds of damages could affect how useful and functional your device becomes; therefore these issues have to be identified early enough.
#### Types of Screen Damage
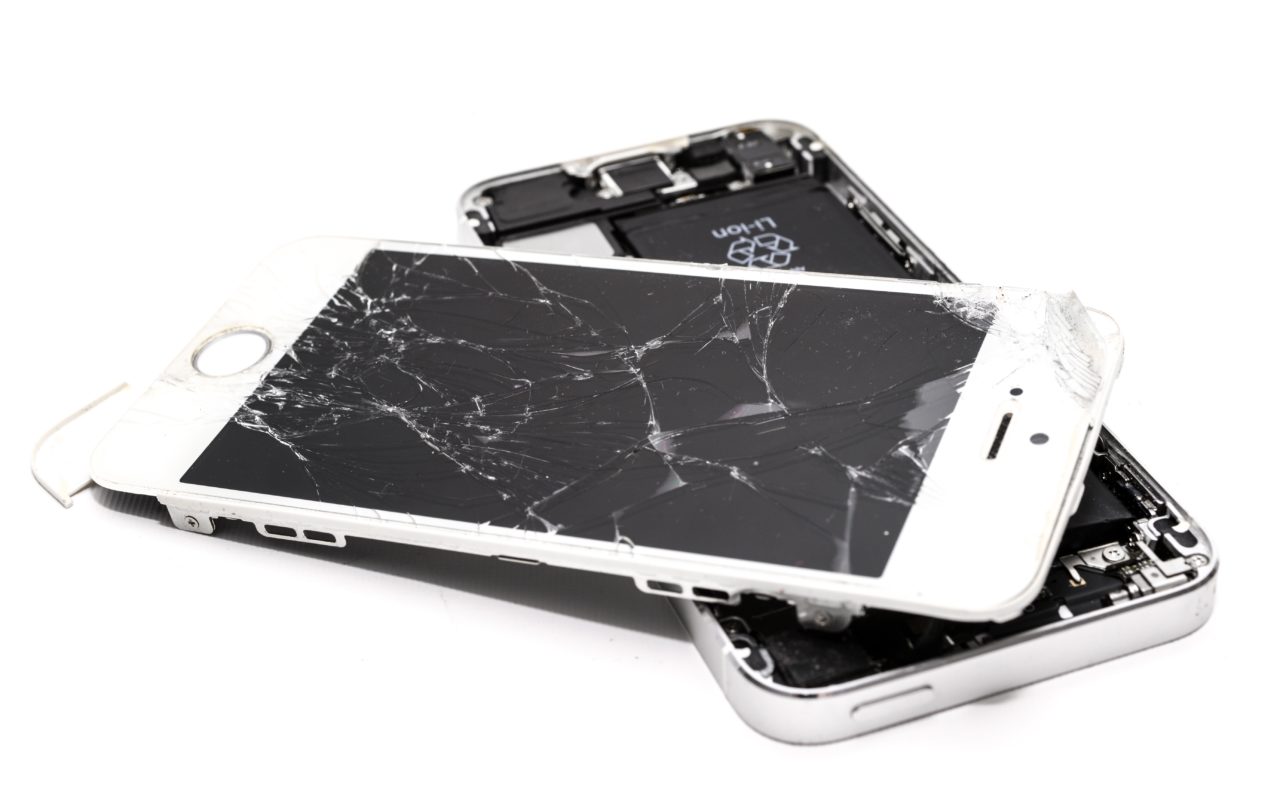
- **Cracks and Shattered Screens**
– **Description**: Cracks may range from little hairline fractures to complete shattering which is usually caused by dropping it down or hitting something hard.
– **Impact**: Even small cracks will tend to spread out with subsequent worsening hence necessitating one to replace the whole screen.
– **Repair**: Small cracks might be fixed using DIY methods while substantial ones often call for a professional approach to fixing broken screens.
- **Dead Pixels**
– **Description**: Dead pixels are tiny black or white spots appearing on the screen which means that there is an inactive pixel within it.
– **Impact**: Functionally, few dead pixels won’t cause much trouble but many dead pixels are distracting and indicative of other underlying problems with your phone’s display.
– **Repair**: You may download software solutions for this issue occasionally though consistent occurrences demand someone fix their damaged screen.
- **Discoloration and Display Issues**
– **Description: Discoloration entails areas on your computer showing incorrect colors faded sections or lines throughout its monitor’s output section.
**Impact:** These affect visibility greatly if not pointing out hardware problems or connectors for the monitor.
– **Repair**: Some display issues might be resolved by adjusting settings or reseating connectors, but persistent discoloration often requires screen replacement and repair.
#### Why Identifying Damage is Important
Screen damage can be properly identified to establish the best way forward in terms of either screen replacement or repair. This ensures that you avoid unnecessary expenses and save time that could have been spent on repairs that will not fully solve the problem. Besides, identifying them in advance will prevent minor damages from getting worse and thus save the cost of repair or replacement.
Understanding the different forms of screen damage and their consequential implications will enable you to make wise choices on whether to replace or fix your device’s screen thereby enhancing its performance and lifetime.
Section ### 3. Assessing Repair vs. Replacement Need

It is important to choose whether to replace a damaged screen or do a simple repair for better maintenance of your device. In this regard, evaluating the extent of damage as well as considering the implications of each option will enable you to make an informed decision. Here’s how to evaluate whether you need screen replacement or repair:
#### Criteria for Deciding Between Screen Replacement and Repair
- **Extent of Damage**
– **Minor Damage**: Small cracks or a few dead pixels might be suitable for simple screen repair. This usually does not interfere much with how a device functions.
– **Major Damage**: Severe cracks, shattered screens, or widespread display issues usually necessitate screen replacement. Owing to substantial destructions that affect the entire surface, fixing alone may not suffice.
- **Impact on Functionality**
– **Functional Screen**: If at all it responds properly while displaying content clearly on its monitor then its status can be maintained through minimal repairs only superficial cracks may just be repaired without having them all replaced
– **Dead Screen**: A screen that is unresponsive, malfunctioning,, or discolored extensively may need replacement. When a device can no longer be used efficiently due to damage, the screen must be replaced.
- **Cost Considerations**
– **Repair Costs**: Evaluate the cost of repairing a damaged screen. In most cases, screen repair costs less than replacement with slight damages.
– **Replacement Costs**: Assess the price of a new screen in comparison to repair. If repair charges come close to or surpass what could buy a new screen then replace it. Further, compare this against the value gained from buying an entirely new one.
- **Time and Convenience**
– **DIY Repair**: DIY repairs are an option if you are skilled and have tools for minor problems with your computer’s monitor. However, it requires precision and patience.
– **Professional Services**: Professional replacement services exist for worse scenarios where you cannot do it yourself on screens because they offer experience and time effectiveness. While professional repairs may cost more money, they yield better results that often come with warranty covers such as in the case of the iPhone 7 Plus.
- **Device Age and Value**
– **Newer Devices**: For recently purchased devices or those that have significant value, there is a need to invest in screen replacement options to keep them in top shape.Done appropriately will maintain overall value at stake here: only when you’re certain about it.
– **Older Devices**: Since these screens start losing their value after some time, it may not make economic sense to spend on one. In some cases, rather than spending money on replacing the display unit, you might find it cheaper to purchase another device altogether.
#### Making an Informed Decision
Assessing the extent of damage incurred by each factor would enable one to choose between fixing or installing again; one however needs also to consider cost implications plus effects on equipment operations. An evaluation of these three aspects will enable you to choose the most practical solution for maintaining and improving the performance of your device. Before deciding on whether to undertake a simple repair or replace your entire screen, it is important to understand what your needs are to make an informed decision about how best to invest in its maintenance.
#### Making an Informed Decision
When resolving issues related to screens, it is necessary to consider the extent of damage, cost implications as well as their impact on the functionality of a certain device. Therefore, by considering these factors one can arrive at the best remedy that will make his/her gadget work efficiently for a long. For example, before settling on a mere repair or complete screen changeover it is better if you identify your various needs in order not to spend much while also thinking about its life span.
Section ### 4. Tools and Materials for Screen Replacement
The right tools and materials are crucial for successful screen replacement and repair. Proper equipment guarantees accuracy and minimizes potential risks. Here’s a comprehensive guide to the essential tools and materials you need for screen replacement and repair:
#### Essential Tools for Screen Replacement and Repair
- **Screwdrivers**
– **Precision Screwdrivers**: Small accurate screwdrivers are required when removing screws without tangling them up; different devices have varying types like Phillips, flathead, and Torx screwdrivers.
– **Magnetic Screwdrivers**: These help prevent losing tiny screws during the screen replacement process.
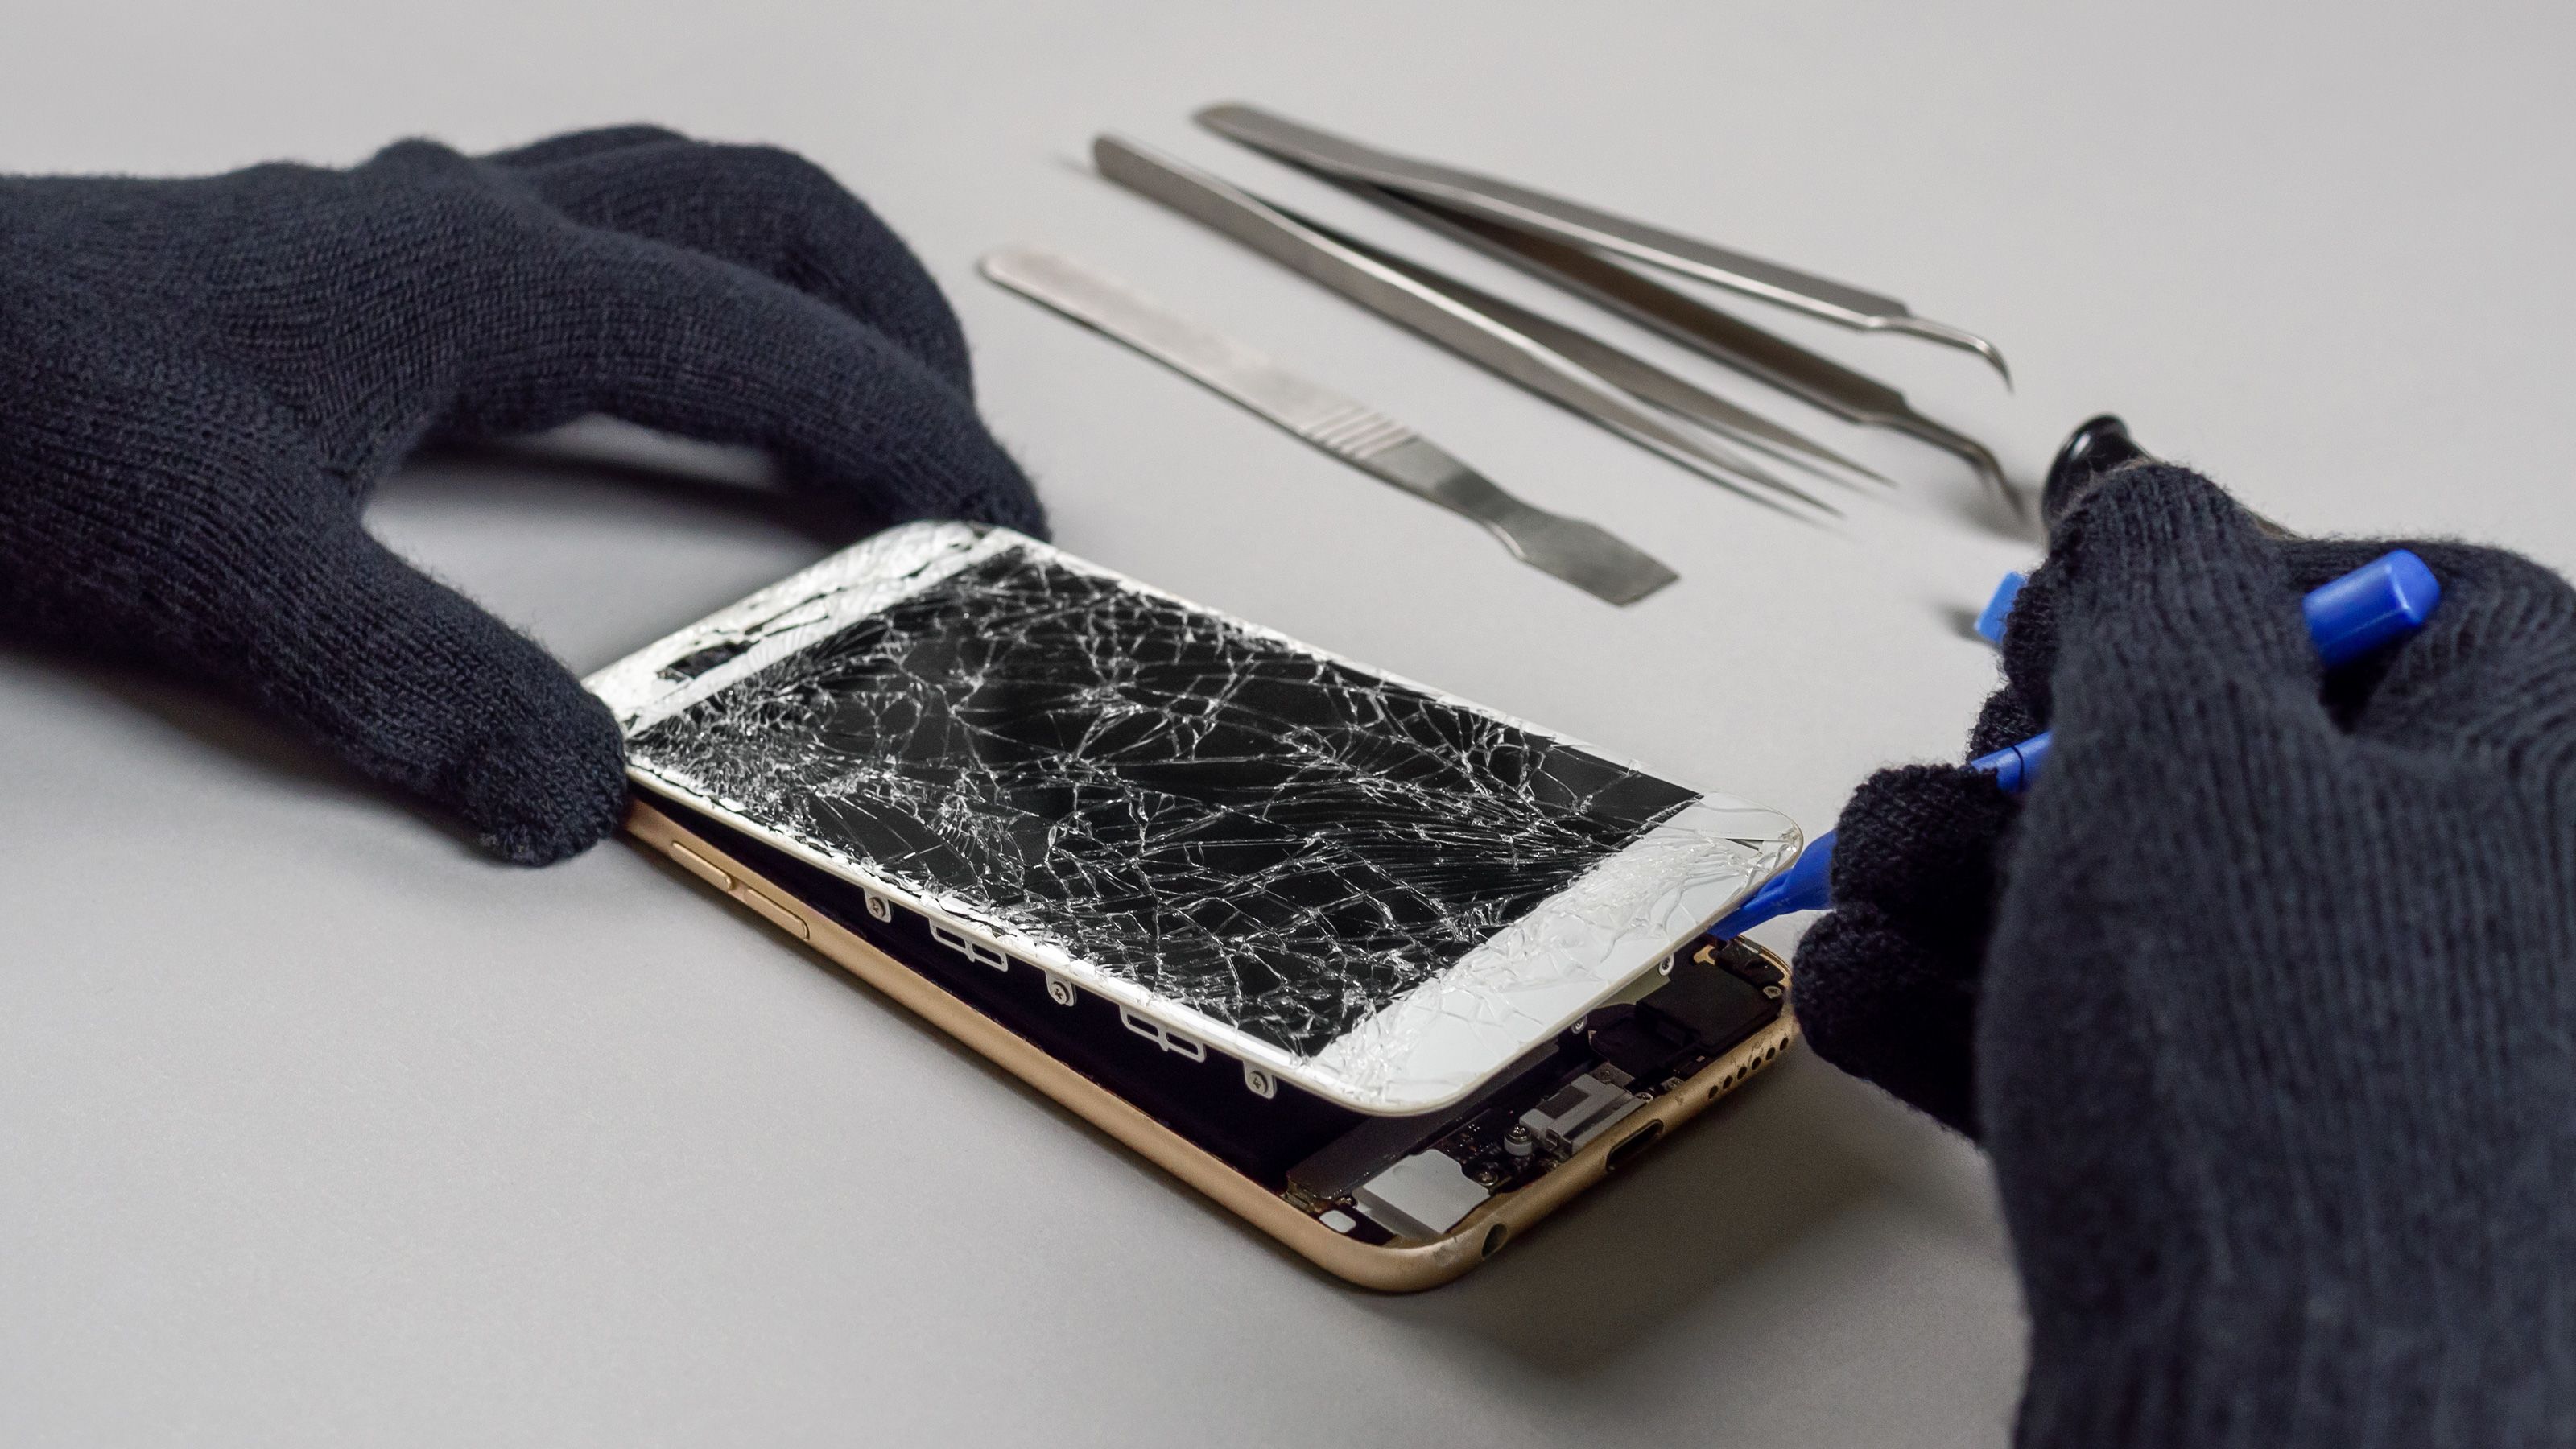
- **Pry Tools**
– **Plastic Pry Tools**: These tools assist in opening electronic cases without creating any scratches or dents on their body. Thus, this means they must be utilized whenever one wants detached screens from their edges.
– **Metal Spudgers**: In some cases, more effort ought to be applied especially where someone is struggling with stubborn displays but should be done correctly in order not to damage anything else.
- **Tweezers**
– **Fine-Tip Tweezers**: This is vital while handling small parts and screws during the process of fixing a screen. Wherever tiny bits are involved, it helps in positioning them accurately.
- **Suction Cups**
– **Screen Removal Suction Cups**: These are used to free the screen from its frame inside the device without interfering with what’s within. Strong suction cups are particularly useful for devices with adhesive-bonded screens.
- **Heat Gun or Hair Dryer**
– **Heat Application Tools**: You can get rid of the screen without damaging anything, by heating it and softening the adhesive. For those doing DIY repairs, a hair dryer can be used while heat guns offer precise control.
- **Adhesive Strips and Glue**
– **Double-Sided Adhesive Strips**: This is for securely reattaching screens to their frames. Good-quality adhesive strips will keep the screen in place.
– **UV Glue**: This is a strong bond that lasts when reattaching screens to some devices. The glue must be cured properly using a UV light.
- **Cleaning Supplies**
– **Microfiber Cloths**: These are necessary for cleaning screens before and after replacing them to remove fingerprints and dust.
– **Isopropyl Alcohol**: It ensures that surfaces are clean and prepares them for new bonding with no old adhesives on it.
#### Additional Materials for Effective Screen Replacement and Repair
- **Replacement Screen**
– **Compatible Replacement Screen**: It should fit your device model which is important because bad-quality replacements damage display quality and touch sensitivity immediately.
- **Static Wrist Strap**
– **Anti Static Wrist Strap**: During the replacement process, this strap is worn to prevent static electricity from causing damage to internal components of the machine or any other part thereof.
- **Plastic Cards**
– **Thin Plastic Cards**: They are good separators between the screen and frame to prevent breakage of delicate parts, example wires along these areas on many phones nowadays if carelessly forced apart with fingers instead of these cards carefully placed in such spaces as well as phone corners too without harm whatsoever all through or whatsoever indeed so all in all it takes an hour sometimes even more just depending how much attention one would love giving while taking apart particular phone especially if never done before since opening requires greatest patience over which one has not always had gear available concerning phones like ourselves still find it very annoying when they break then at last leave your phone like.
- **Screen Protector**
– **Tempered Glass or Plastic Screen Protectors**: After replacing the screen, you can apply a screen protector to prevent future damage and extend its life.
#### Importance of Using the Right Tools and Materials
Screen replacement and repair must be done using the right materials and tools to prevent further damage and achieve success. This will ensure accurate workmanship, avoid other components being damaged as well as guarantee a secure, long-lasting screen installation.
These are essential items that should be in every toolkit for anyone doing a screen replacement or repair whether you are a professional or just an amateur technician. With high-quality tools & materials, one is guaranteed of smoother processes hence higher effectiveness while replacing screens on different devices including mobile phones plus others we have not mentioned here since these vary from model by brand which also determine availability thereof thus causing more expensive replacements than would otherwise occur through proper handling instead maintaining originality alongside durability throughout continued even after few years so everything looks original always with least alterations possible until they reach end eventually together many people’s hands who were once primary owners before their disposal back into market thereafter those persons bought new copies even though some might prefer selling used products rather than throwing them away still there exist sellers willing buy any type provided decision made within reasonable period ripe enough attract customers thereby generating sufficient profit margins finally becoming successful entrepreneur first step towards starting this business always comes purchasing certain equipment required start running such venture but then again how does someone know what precisely must be acquired without knowing specifics involved?
Section 5 ##: DIY Screen Repair – Step by Step
DIY screen repair can be a productive and cost-effective way of fixing your gadget. When you follow a comprehensive step-by-step guide, you will be able to take care of minor screen issues without the assistance of professionals. Here is a detailed guide on how to do a DIY screen repair:
STEP 1: Prepare Your Workspace.
- **Clean Surface**
– *Description*: Make sure that before starting the process, your working space is clean and level so that small components do not fall off and also to keep your device as well as its screen free from dust and dirt.
– *Focus Keyword*: Having a neat workplace in which you are doing the repairs will prevent damage or loss of parts.
- **Gather Tools and Materials**
– *Description*: Gather all necessary tools and materials such as screwdrivers, prying tools, tweezers, suction cups, adhesive strips, and a replacement screen.
– *Focus Keyword*: Acquiring relevant tools and materials is important for this repair process.
- **Safety Precautions**
– *Description*: Wear an anti-static wrist strap to protect internal components against static electricity damage when you touch them; besides ensure the device is powered off and disconnected from any power source.
– *Focus Keyword*: Security measures are paramount during such repairs therefore use an anti-static wrist strap around your device as recommended herein.
STEP 2: Remove Damaged Screen.
- **Loosen Screws**
– *Description*: Use a precision screwdriver while removing screws holding down the screen because they are very tiny and hence possible to losses if carelessly handled.
– *Focus Keyword*: It’s vital that you carefully remove screws with precision during this exercise so as not to interfere with internal computer hyperlinks or the fragile computers themselves.
- **Apply Heat (If Necessary)**
– *Description*: In case the screen is held by adhesive, soften the edges with a heat gun or hair dryer.
– *Focus Keyword*: Applying heat while repairing a screen helps release it without any damage done.
- **Pry Open The Screen**
– *Description*: Gently lift the screen from the device frame using plastic pry tools or suction cups being careful not to damage internal cables and connectors.
– *Focus Keyword*: Light prying techniques are important during this repair so that nothing harmful can happen to your computer parts.
- **Disconnect Cables**
– *Description*: Delicately detach any cables or connectors linking the screen to your device and use tweezers if necessary for accuracy.
– *Focus Keyword*: To avoid damaging soft connections, correct disconnection of cables is essential in these repairs
STEP 3: Install New Screen.
- **Connect New Screen**
– *Description*: Attach the new screen by connecting its cables and ensuring they are securely fitted.
– *Focus Keyword*: Connecting your newly bought piece properly is very crucial at this stage because it will affect how well you can use it back again as usual after a significant repair process.
- **Secure The Screen In Place**
– *Description*: Apply new adhesive strips or UV glue around edges if there is any; where the screen is adhesive bound and then carefully position the screen before pressing on it tightly to secure it firmly in place.
– *Focus Keyword*: During such repair processes, you must always ensure that you utilize appropriate adhesives to ensure that even after replacement, the new screens remain safely attached ontottor rightful positions respectively.
- **Reattach Screws**
– *Description*: Put back screws removed earlier which helps in keeping the screen locked into place within the device frame just as they were before; therefore make sure that all screws are fastened well enough.
– *Focus Keyword*: Proper reattachment of screws is necessary because it keeps the device intact.
STEP 4: Test New Screen.
- **Power On The Device**
– **Description**: Turn on the machine to check if the new screen is working appropriately. Check for visual sharpness, touch sensitivity, and any other mishaps that may arise.
– **Focus Keyword**: Testing the newly installed screen is important to confirm that screen repair succeeded.
- **Troubleshoot Issues**
– **Description**: If there are unexpected behaviors by the screen, verify all connections again and ensure the screen is attached properly. In case of any confusion, follow the troubleshooting guides.
– **Focus Keyword**: Troubleshooting is an effective way of fixing various problems encountered during durtheethe repair process.
#### Final Tips for Successful DIY Screen Repair
- **Follow Manufacturer Instructions**
– **Description**: Consult your device’s manual or manufacturer instructions for specific information about repairing a screen in your model.
– **Focus Keyword**: Complying with guidelines from manufacturers facilitates easier repair of screens reducing chances of errors in operation.
- **Take Your Time**
– **Description**: Avoid rushing and making mistakes while going through this process. Be patient enough to do each step correctly.
– **Focus Keyword**: Patience will pay out when it comes to successful repairing and prevention of damage to screens.
With the help of this guide, you can repair a broken screen yourself and consequently save money as well as elongate the lifespan of your device. The success of screen repair largely depends on the process’ proper preparation, cautious execution an,d, thorough testing.
Section ### 6. Professional Screen Replacement Services

Opting for professional screen replacement services can be a wise choice, especially for complex or severe screen issues. Professional services offer expertise, quality assurance, and often a warranty on the repair. Here’s a detailed overview of what to consider when choosing professional screen replacement services:
#### When to Seek Professional Help
- **Severe Damage**
– **Description**: Shattered screens or those with no responsiveness can only be fixed by professional screen replacement.
– **Focus Keyword**: In most cases, severe damage will necessitate the services of professional screen replacements to avoid malfunctions.
- **Lack of DIY Skills**
– **Description**: To prevent costly mistakes due to lack of technical ability or access to proper equipment, it is best to get help from a professional.
– **Focus Keyword**: For those without any DIY skills, it is better to use a qualified technician for screen replacement.
- **Warranty Considerations**
– **Description**: Devices under warranty should be repaired by authorized professionals so that they don’t lose the warranty coverage.
– **Focus Keyword**: Where one’s devices are still under warranty, one should engage professional screen replacement service providers for purposes of guaranteeing the device’s coverage and ensuring warranty compliance.
#### Choosing a Reliable Professional Service
- **Reputation and Reviews**
– **Description**: Review their reputation and level of customer satisfaction on existing review sources before you decide on your choice for such service providers.
– **Focus Keyword**: A reputable firm in this field will provide reliable professional services leading to customer satisfaction.
- **Certification and Experience**
– **Description**: Ensure that you find certified technicians with experience in replacing screens specifically about your device model.
– **Focus Keyword**: Expert certified experienced technicians ensure quality repair work while changing screens correctly.
- Warranty on Repairs
– Description: Select a service provider that offers warranties with their screen replacement jobs so as not only to give confidence but also to protect you against future problems.
– Focus Keyword: Having a warranty for one’s device indicates that they have had their screens replaced professionally therefore guaranteeing future utilization of the repair done.
- Turnaround Time*
– Description: Also consider how long it takes to fix the problem according to the service provider; some professionals opt for the er turnaround services at an extra cost.
- **Cost Estimates**
– **Description**: Look up different service providers and find out what they charge.
– **Focus Keyword**: Find the best deal on a replacement screen by comparing cost estimates from professionals.
#### Benefits of Professional Screen Replacement
- **Expertise and Precision**
– **Description**: Professionals have the right skills to make sure that only the broken parts of your gadget are changed.
– **Focus Keyword**: Expertise in screen replacement guarantees you good repair work thus maintaining the functionality and appearance of your device.
- **High-Quality Parts**
– **Description**: Genuine OEM (Original Equipment Manufacturer) spare parts for your device from professional services.
– **Focus Keyword**: Good quality materials in professional screen replacement ensure compatibility and long-lastingness.
- **Safety and Security**
– **Description**: They conduct repairs within controlled environments, where there is no risk of causing further damages or security issues arising out of it.
– **Focus Keyword**: These are secure processes involved in working with a professional screen replacement company which protects both your device as well as data during the process
- **Convenience**
– **Description**: Letting specialists do all the tough work so that you can sit back and relax
– **Focus Keyword** – The ease of accessing professional screen replacements is an added advantage since you won’t get yourself into any trouble.
#### How to Find a Professional Screen Replacement Service
- **Online Search**
– **Description:** Go through Google mapMaps identify reputable local businesses that offer cell phone glass replacements; ensure you check their ratings and customer reviews on Google mapMapsior to making any commitments with them
– **Focus Keyword:** Online searches will connect you with highly rated professionals who deal with mobile phone glass repair or replacement jobs.
- **Manufacturer Recommendations**
– **Description:** Check out the website of your device manufacturer for information on authorized repair centers and recommended service providers.
– **Focus Keyword:** When you go for professional screen replacement outlets that are recommended by the manufacturers, you can trust them to carry out authorized services.
- **Referrals**
– **Description:** Reach out to friends, family members, or coworkers who have used various screen replacement services in the past and ask them for suggestions on the best companies that you can consider.
– **Focus Keyword:** Personal referrals will give you some of the best professional mobile phone glass repairs.
Choosing a professional screen replacement means fixing your gadget precisely with high-quality spare parts backed up by a warranty. Whether it is severe damage or simply because one wants it done by an expert conveniently, selecting the right service provider is critical to successful screen replacement.
Section ### 7. Cost Comparison: DIY vs. Professional Repair
When a device’s screen cracks, weighing up costs between repairing it yourself and using a professional is key to making an informed decision. Both options come with their costs as well as benefits and potential downsides; therefore here is a detailed analysis that will guide your selection:
#### Costs of DIY Screen Repair
- **Tools and Materials**
– **Initial Investment**: For instance, initial materials include screwdrivers, prying tools, adhesive tapes and, strips, as well as spare screens whose prices range between $20 – $100.
– **Focus Keyword**: Investing in tools and materials to fix my damaged glass myself could save me money over time if I can afford the initial expenditure.
- **Replacement Screen**
– **Cost**: The price of a new touch-screen varies depending on device model and quality: while generic alternatives may cost around $20 – $50 there are also original equipment manufacturers (OEM) versions ranging from $50 – $200.
– **Focus Keyword**: It is important to choose the correct replacement screen as it has a huge impact on successful DIY screen repair and can dramatically affect your total cost.
- **Time and Effort**
– **Description**: Screen repair by yourself takes time, patience, and a steady hand. This process can last 1-3 hours depending on how skilled you are and how complicated the repair is.
– **Focus Keyword**: When comparing costs, consider the time and effort involved with DIY screen repair as it affects overall value.
- **Risk of Additional Damage**
– **Potential Costs**: Errors made during DIY repairs may lead to further damage, which could increase the price in case additional repairs or professional help become necessary.
– **Focus Keyword**: The risk of extra damage is a major consideration about do-it-yourself (DIY) screen repair service which might offset any initial savings made from reduced costs.
#### Costs of Professional Screen Replacement
- **Service Fees**
– **Cost**: On average, professional screen replacement services charge between $100-$300 for device type and extent of damage.
– **Focus Keyword**: Although more expensive, service fees for professional screen replacement usually include labor charges, expertise, and quality assurance.
- **Replacement Parts**
– **Quality and Cost**: Typically high-quality/OEM replacement parts are used by professionals at an additional cost that guarantees better performance as well as long-term use
– **Focus Keyword**: The cost of replacement parts in professional screen replacement reflects the quality and reliability of the service itself.
- **Warranty and Guarantee**
– **Description**: Some expert services provide warranties or guarantee their work thus eliminating worry about future issues and completely providing peace-of-mind coverage against problems down the line.
– **Focus Keyword**: A warranty on professional screen replacement services adds value by ensuring long-term reliability.
4.**Turnaround Time*
– **Time Costs**: Depending on the company, standard repair times may vary from 1-5 days with some offering expedited services at an additional cost.
– **Focus Keyword**: Comparing costs and convenience, consider the time it takes for professional screen replacement to occur.
#### Benefits and Drawbacks
- **DIY Screen Repair**
– **Benefits**: Lower upfront costs, personal satisfaction, learning experience, and flexibility in scheduling.
– **Drawbacks**: Risk of additional damage; no warranty; significant time investment; not professionally done
– **Focus Keyword**: However, DIY screen repair saves money and gives personal satisfaction but is a risky undertaking with potential disadvantages.
2.**Professional Screen Replacement**
– **Benefits**: Expertise, high-quality parts, warranty, and time-saving. Reduced risk of further damage and convenience.
– **Drawbacks**: Higher initial costs and reliance on service provider availability.
– Focus Keyword: Professional screen replacement guarantees expertise as well as quality assurance but usually has a higher cost
#### Making an Informed Decision
- **Evaluate Your Skills**
– **Description**: Consider your technical skills and comfort level with handling delicate components. If you are confident, DIY may be a viable option.
– **Focus Keyword:** When deciding between DIY screen repair or professional screen replacement it is important to assess your skill level first.
2.**Consider the Device’s Value**
-**Description:** For devices that are high value or relatively new professional screen replacement might be worth the investment so tove better performance as well as make them last longer
-* *Focus Keyword*: Therefore, whether to attempt DIY screen repair or go for proa fessional replacement service depends on the device’s value.*
3.**Weigh the Costs and Benefits**
-* *Description*: weigh all associated costs against benefits to determine whether using either approach will save you money and time.
– **Focus Keyword**: Make an informed decision by weighing the pros and cons of DIY screen repair against professional replacement.
By comparing the costs, benefits, and, risks inherent in do-it-yourself (DIY) screen repair with those associated with expert replacement of screens, you can select the best alternative for your case on a budget. Knowing these elements will make sure that you settle for the most strategic move that will give your device maximum performance.