Introduction Mobile Repairing Charging Ports
Welcome to our all-inclusive guide on repairing charging ports. Our world is characterized by technological advancements, and our tools serve as a lifeline, yet a broken charging port can lead to disconnection. These ports are crucial in everyday life from phones to laptops, but they tend to be fragile sometimes. In this article, we will discuss the nitty-gritty of recharging point fixing enabling you to self-diagnose, troubleshoot, and maybe fix them. Read on and make your tech-savvy hands capable!
### Section 2: Assessing the Damage: Diagnostic Methods for Charging Port Repair

Before taking any steps towards repairs it is important that you first establish the extent of the damage done to your charging port. Here is how you can go about this:
#### 1. Visual Inspection:
Initially examine visually whether there are physical damages or debris build-ups in the port; look out for bent pins, corroded parts, or anything that could block connection.
#### 2. Testing with Different Cables and Chargers:
Use alternative cables and chargers to ascertain if the fault is with the port or accessories themselves. If one wire works while another doesn’t then it may be a cable problem.
#### 3. Software Diagnostics:
Some devices have built-in diagnostic tools that can identify charging port issues.
Check out software-based troubleshooting options under your device’s settings or consult your manufacturer’s website.
#### 4. Voltage and Current Measurement:
With a multimeter measure voltage and current output of a charging port by comparing with values given by manufacturers specification for possible variances that would mean faulty ports.
####5.Professional Assessment
When unable to identify where the problem lies it would be advisable to consider professional help so that they can do more advanced diagnostics using special tools that help locate where exactly there is wrong with the charger section.
This way you will be able to determine how best you can repair your charging port most effectively and conveniently after thorough diagnosis of damage through these diagnostic methods.
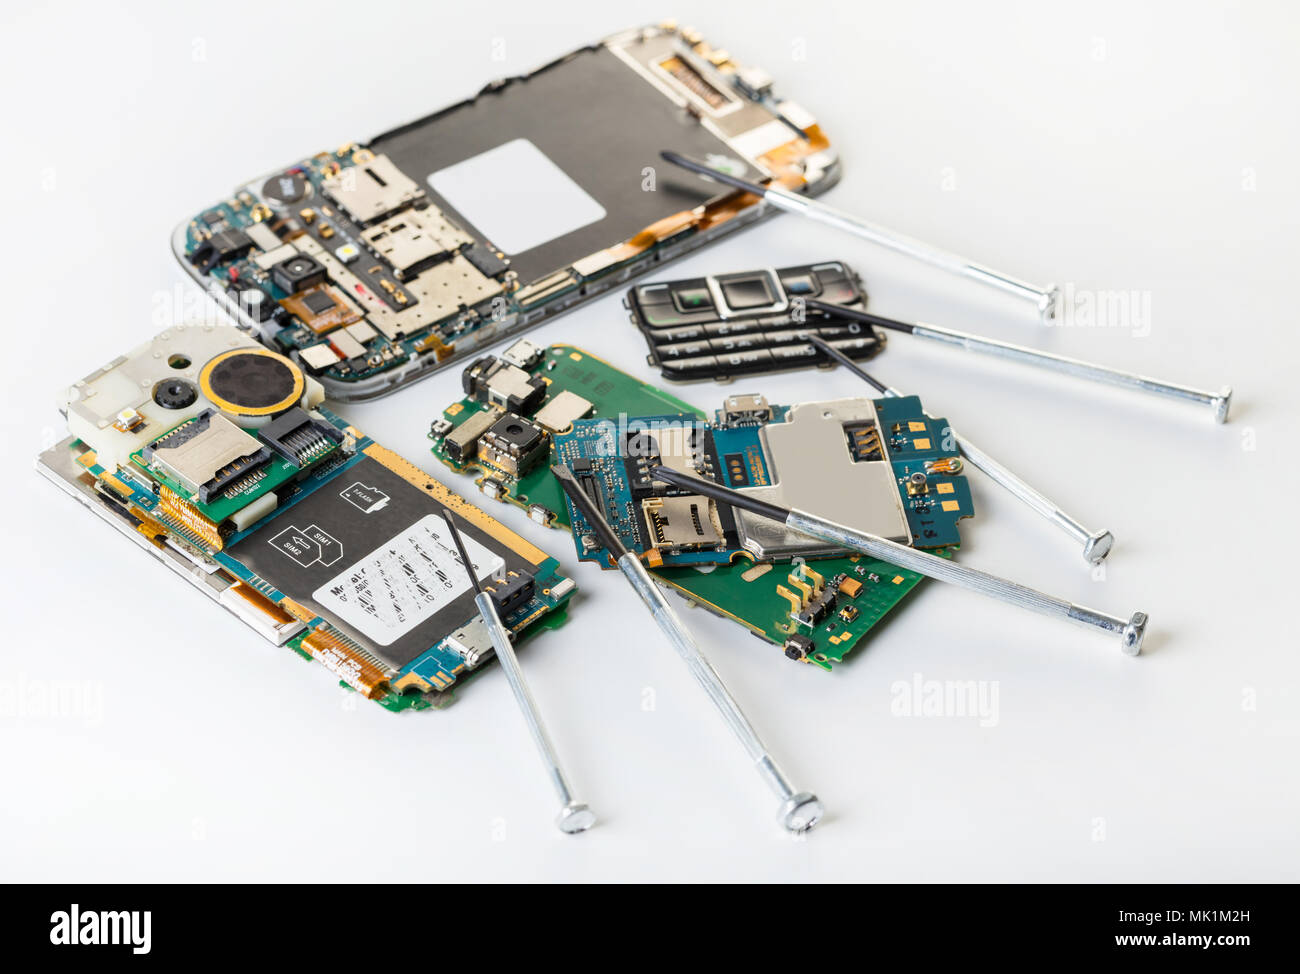
### Section 3: Tools of the Trade: Equipment Needed for Charging Port Repair

To fix a charging port, you need to have the required tools. Below is an exhaustive list of these essentialities:
#### 1. Precision Screwdriver Set:
A precision screwdriver set with various interchangeable heads is crucial for taking apart electronic devices without damaging sensitive parts.
#### 2. Spudger or Opening Tool:
These non-conductive tools help pry open device casings without scratching or damaging the surface. They are essential for safely accessing the internals of your device.
#### 3. Soldering Iron and Solder:
For repairing damaged or broken charging ports, a soldering iron, and high-quality solder are important because they enable you to reattach loose connections or replace faulty components.
#### 4. Desoldering Pump or Wick:
It helps to remove excess solder neatly and quickly whenever there is a need to take off some parts like replacing them altogether using a desoldering pump or wick.
#### 5. Magnifying Lamp or Loupe:
An enhanced visibility magnifying lamp or loupe will enable you to handle tiny details that would normally escape your attention when working on small components with maximum accuracy.
####6.Heat Gun or Hot Air Station
To reflow solder, replace surface-mounted components and other advanced repairs require a heat gun/hot air station that provides controlled heat to specific areas.
####7.Anti-Static Mat and Wrist Strap
Anti-static mats and wrist straps can be used to avoid electrostatic discharge, which keeps you in touch with the work surface.
#### 8. Cleaning Tools:
After repairs, cleaning debris, dust, or corrosion from the charging port and surrounding areas requires the use of isopropyl alcohol, cotton swabs, and a soft brush.
#### 9. Replacement Parts:
You might require new charging ports or flex cables based on how badly it has been damaged. Ensure that you have all the correct replacement parts before starting to fix it.
When you possess these essential tools you can be sure to repair the charging port with confidence and precision leading to a successful outcome as well as restoring the functionality of your electronics.
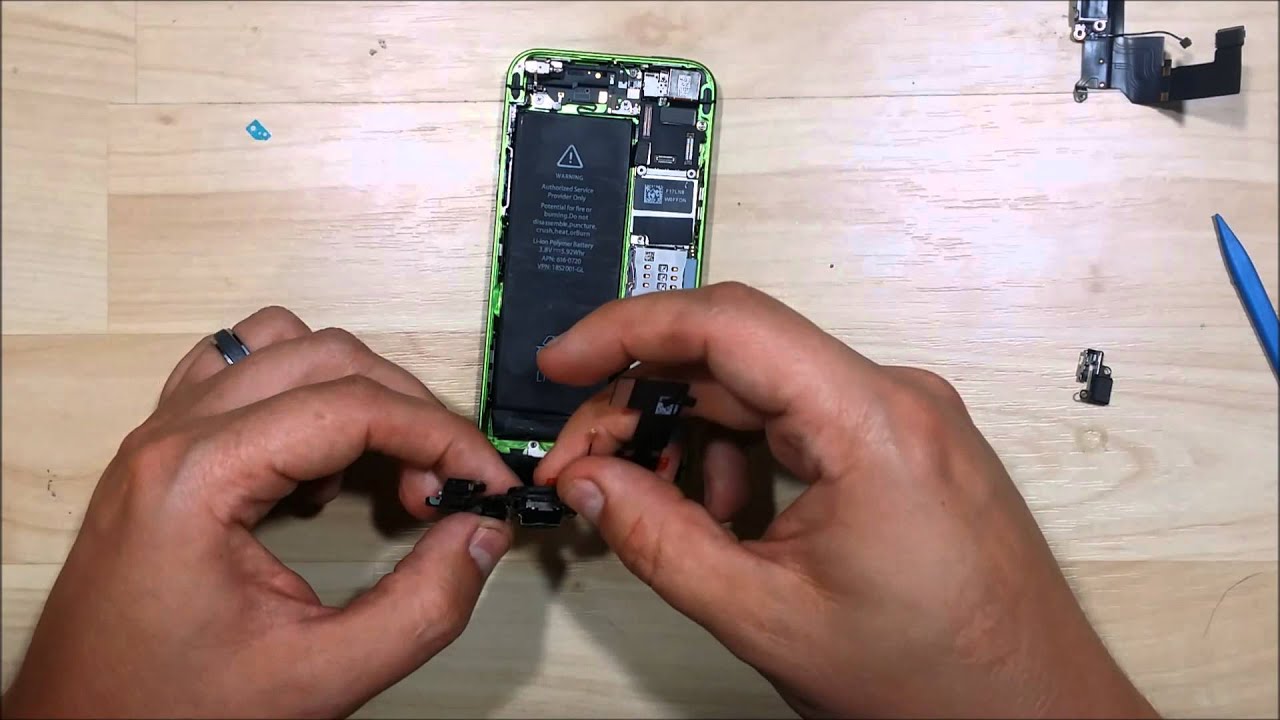
### Section 4: Disassembly and Access: Opening Up Devices Safely
It’s precise disassembling of electronic devices that enables one access to repair charging ports without causing further damage. For safe and effective disassembly follow these steps:
#### 1. Necessary Tools:
Before beginning make sure you have every required tool listed in section 3 like precision screwdrivers, spudgers, and magnifying lamps among others.
#### 2. Power Off; Disconnect:
Turn off the power supply of this device and remove it from any source so that no electric hazard occurs during the dissembling process.
#### 3. Device Manuals as Reference:
Search for specific manufacturer’s instructions on how exactly this device should be dissembled by using its manual or looking up information online.
#### 4. Screws Identification plus Removal:
Screws used for closing up devices’ housing are removed carefully using a screw head which is appropriate for them being kept in mind to ease the reassembly process later on.
#### 5. Use Openers:
Slowly insert a prying tool such as a spudger into cracks along the edges of a device thereby releasing clips or adhesive within casing sections together then take time because breaking external coverings is risky when delicate elements are there inside.
#### 6. Do It Step by Step:
As you remove the casing, observe the inside arrangement of parts as well as their relationship to other components and wires. Avoid applying any force or twisting delicate elements.
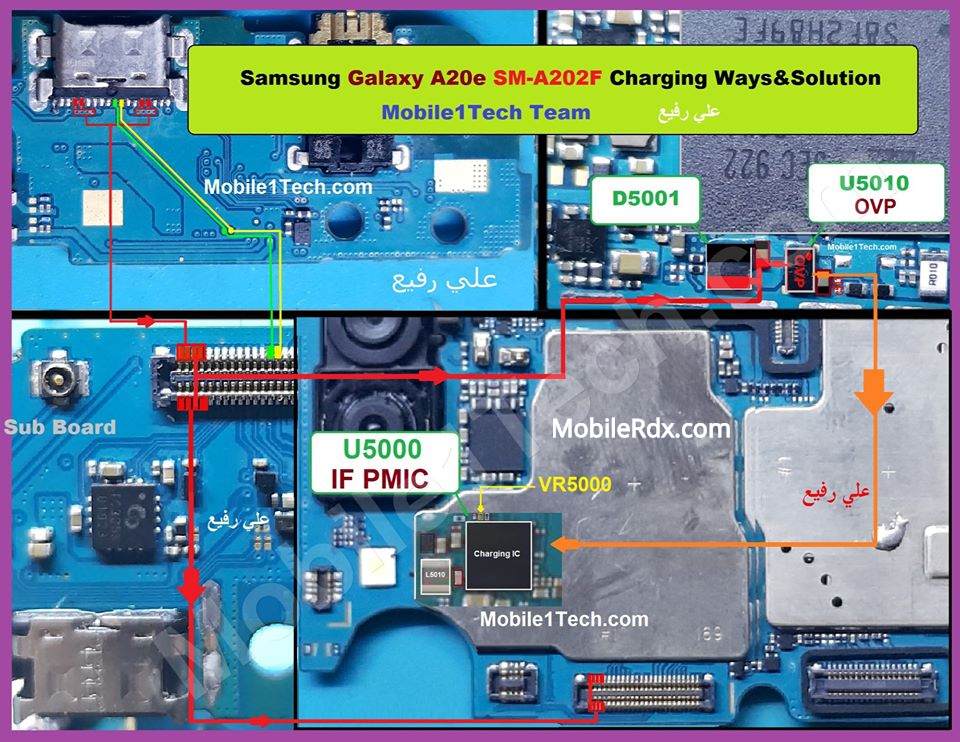
#### 7. Get to the Charging Port:
Identify where the charging port is after removing the housing. This part can either be connected to a separate board or directly mounted on top of the main circuit board depending on the device used.
#### 8. Handling of Components with Care:
Prevent electrostatic discharge and accidental damage that may occur to internal components by being gentle while handling them. Lockout static and avoid touching bare skin against an exposed circuit.
#### 9. Documenting Disassembling Process:
Make notes or take pictures, especially on cable routing and connector placements during disassembly so that it would help in reassembling later.
#### 10. Caution Is Required:
When taking apart your device, be careful at every step before completing its final disassembly process because there are some points where resistance might be felt or uncertainty about something could arise thus one always has to remember his/her user’s manual for advice from reputable repair sources when needed.
Following these instructions will help you safely open up your device for access and repair of the charging port resulting in a successful fix without damage occurring to it.
### Section 5: Repair Techniques: Step-by-Step Guide to Fixing Charging Ports
Fixing charging ports requires precision and attention to detail. Here are some steps you should follow carefully to fix a faulty charging port using step-by-step techniques:
#### 1. First Appraisal:
Begin by re-examining the charging port to determine what type of damage it is and how serious such damage is; see if all connections going into this have been tightened properly plus any signs of physical obstructions like dust have been removed fully
Clean the charging port and the surrounding vicinity completely by using isopropyl alcohol along with a soft brush or cotton swab. Get rid of dirt, dust, or corrosion that might be interfering with the connection.
- Inspection:
Survey the charging port to establish whether there are any obvious damages such as bent or broken pins, loose connections, and signs of overheating. Any problems noticed should be remembered during the repair process.
- Pin Straightening:
If any pins have been misplaced or bent in their socket, use fine-tipped tools for instance tweezers or needles to push them back to their correct place gently with a lot of care not to further break the pins.
- Re-soldering:
Visually inspect the solder joints on these ports, if any joint looks like it may be cracked/broken/reduced then apply heat from a soldering iron making sure it is properly distributed over all parts before it’s allowed to flow into place creating an electrically secure bond.
- Connector Replacement:
Should our charger be irreparably damaged; we need to carefully detach this old connector by desoldering so that we can attach it to the new one without damaging nearby components during disassembly.
- Cable Testing:
After fixing your device try testing it against several cables together with chargers just to ensure it’s working well by checking secure connections alongside the appropriate charging process.
- Reassembly:
When you have finished repairing, reverse the steps one has taken when taking apart the gadget then put back its pieces cautiously until it is ready for closing up therefore make sure you align every component properly and tightly screw them firmly together
- Final Testing:
Turn on the unit for us to ascertain proper functioning via its charging port whereby testing must include performance while connecting plus absence concerning overheating issues.
- Preventive Measures:
Adopt preventive measures including employing usage protective cases as well as cable management methods aimed at reducing the chances of future charging port damages. Maintain regular check-ups and maintenance of your charging ports to enable them to prevent dust from accumulating on their surfaces.
If these repair methods are followed step by step, you will be able to diagnose and fix charging port problems efficiently thus making your device deliver its functions again as well as prolonging its life span.
Section 6: Guidelines for the Soldering Novice: The Best Soldering Techniques for Port Repair
Soldering is an elementary skill required for port repair when one wants to fix charging ports. Here are some tips and tricks on how to solder the port properly.
#### 1. Choose the Right Soldering Iron:
Pick a soldering iron with a few temperature settings and a fine tip suitable for working with small electronics. A temperature-controlled iron ensures that you apply heat where it’s needed, preventing damage to delicate components.
#### 2. Get the Work Area Ready:
Arrange a clean and well-lit workspace that is properly ventilated. Use anti-static mats and wrist straps so that you discharge any electricity that could ruin the electronic parts of your device.
#### 3. Selection of Appropriate Solder:
Opt for quality solder with a flux core meant for electronic repairs only. The flux helps in the flow of solder as well as making strong connections.
#### 4. Tin Your Solder Iron:
Apply enough solder across the entire surface of your tinned iron before using it; this keeps away its rustiness, thus ensuring maximum performance in terms of efficiency while also transferring warmth.
#### 5. Preparing Components:
Use isopropyl alcohol to clean surfaces being soldered to remove dirt or oxidation before applying heat through wires onto them again! Each part should be held firmly together during laundering: ensure alignment is proper!
#### 6. Apply Solder:
Heat the joint by touching the connection point lightly with a soldering iron tip, simultaneously adding melt-down soldier on the heating area until it all melts down into smooth shiny creating no build-up or cold joints at all!
#### 7. Avoid Overheating:
As overheating may cause circuitry damage or thermal stress, sensitive components need to be protected from this extreme heat; hence select minimal temperature requirements and reduce the time of heat exposure.
#### 8. Proper Technique:
When soldering, keep a steady hand and gently push the iron into the joint. Do not move it around too much or take it off multiple times as this may damage nearby components.
#### 9. Inspection and Testing:
Visually check after soldering that there is even solder flow in the connections and no bridges or cold joints; check for conductivity using a multimeter.
#### 10. Continuing to Practice:
Every experience will develop a person’s skills whenever they practice more on soldering. Therefore, set aside enough practice time so you can improve your skills in soldering by getting help from qualified technicians.
Mastering Soldering Essentials will give you the confidence you need to fix charging ports effectively and other electronic devices, thus ensuring reliable repairs that last longer.
Section 7: Quality Check; Don’t Compromise with Repairs
Quality assurance is very important for any charging port repair since if not properly done, the repaired port will not function well and may break down again anytime. Here are some of the tests that can be used alongside quality assurance when repairing a charging port:
#### 1. Functional Test:
After fixing your charging port, test its functionality to ascertain that it charges when different cables are inserted into it plus chargers. The charging indicator shows charging connection recognition by the device.
#### 2. Voltage & Current Measurement:
While your device is on a charge, use a digital multimeter to measure voltage and current output at the charging point. Check if they lie within the manufacturer’s specifications
#### 3. Stability Tests:
Test the device’s stability by plugging it into a charger for a long duration. Monitor any current or voltage deviation during charging that shows an underlying problem.
#### 4. Stress Testing:
To test whether the repaired charging port is working well, one must do some stress test which may involve continuously reconnecting and disconnecting cables or chargers as if in real-use situations to identify weak points and possible intermittent connection problems.
#### 5. Connector Integrity:
Check if there are any physical damages on the connector and surrounding parts of the charging port. Additionally, ensure that there is no loose connection or signs of strain on the solder joints.
#### 6. Compatibility Testing:
Examine various devices with which the fixed charging port can connect to ascertain that it works with multiple makes and models without compatibility issues or errors. Thus, it should be ensured that a vast array of devices can attach to this repair without glitches.
#### 7. Thermal Testing:
During the process of re-charging monitor temperature around and within the charging slot in order not to exceed safe limits for operations of these ports since this could indicate poor soldering or any other issues dealt with further investigations.
#### 8. User Acceptance Testing:
Customers are given repaired phones to use as their normal phones for some time to understand how satisfied they will be about its performance with this repaired charging port after giving the phone. To guarantee customer satisfaction and positive feedback, all concerns raised in this stage have been resolved.
#### 9. Documentation and Reporting:
As such, tests involved conducted results obtained including observations made among others corrective actions taken are documented during this period constituting part of future reference concerning our repair process.
#### 10. Follow-Up Support:
In case anything goes wrong with your repairs at a later date you must offer post-repair support services for example advice on troubleshooting should you be approached by the device owner regarding his/her gadget at risk. Additionally, always ensure that you have open lines of communication to address concerns and maintain customer satisfaction.
Thorough testing and quality assurance procedures will enable you to deliver charging port repairs that are reliable and perform at the highest levels of standardization that meet your customers’ expectations.
### Section 8: Preventive Maintenance: Tips to Extend Lifespan of Charging Ports
Maintenance is important for the functionality and life span of charging ports. Here are essential tips to help extend the lifespan of your charging ports:
#### 1. Use Genuine Accessories:
Prefer chargers as well as cables that are recommended by the original device maker instead of buying generic or fake ones which might give the wrong voltage and current output causing harm to a charging port.
#### 2. Avoid Overloading:
Avoid connecting too many devices on one charger or using chargers with high power ratings exceeding the specifications given by the manufacturer because it can strain the charge port resulting in overheating or physical damage.
#### 3. Handle with Care:
Do not twist, bend, or pull charging cables and connectors unnecessarily; thus make sure not to wear them out before they get replaced immediately in case there is any possibility for replacement.
#### 4. Keep Clean Ports:
Use compressed air or a soft brush to clean out dust, lint, or debris that may accumulate over time to avoid scratching these delicate pins when using sharp objects on them during the cleaning process.
#### 5. Protect from Moisture:
This will keep devices and charging ports safe from moisture, humidity, and contact with liquid because as water can corrode the contacts leading to poor connectivity or short circuits. In places like humid environments, it is advisable to use protective cases at times.
- Avoid Extreme Temperatures:
Devices should not be exposed to extreme temperatures i.e. hot or cold ones as battery life may change with temperature fluctuations and also damage charging ports. Therefore, they should be kept in places that have moderate degrees of temperature.
- Regular Inspection
For instance, if you realize that there is any damage on the charging port, any form of corrosion taking place or foreign objects present that can affect connection then this can help a lot in reducing their effect later on when you might spend more time on repairing them than it was necessary. In case of such matters being detected, attend to them immediately so that they do not lead to other complications or deterioration.
- Implement Cable Management
Cable management solutions will prevent cables from tangling or getting entangled with other items which may strain connectors and result in early wearing out of cables.
- Update Software
Software updates come along with optimization relating to charging effectiveness and port functioning so you need to ensure that the software for your device is up-to-date daily since through this you will enable your gadget to use its full potentiality while enhancing chargeability through best performance due to modernization.
- Professional Maintenance:
To lengthen their lifespan a good idea would be regular checkups done by professionals who will clean them up after inspection identifying possible faults before they worsen thus maintaining high performance levels always.
By doing these things right, one does minimize the risks associated with charging port issues while ensuring that all electronic gadgets perform well when it comes to their power needs hence extending their useful life thereby minimizing expenses on repairs.
Conclusion
In conclusion, knowing how to fix my phone’s charging port is crucial in keeping up with technology today if you want to rely on using your device. It is called the charging port repair guide because it guides you through assessing damages and repairs in a way that a flawless operation can occur. Implementing these steps enables one to have their devices for more years, reduces downtime, and minimizes repair costs. Get this information today and keep your tools powered up for good.